
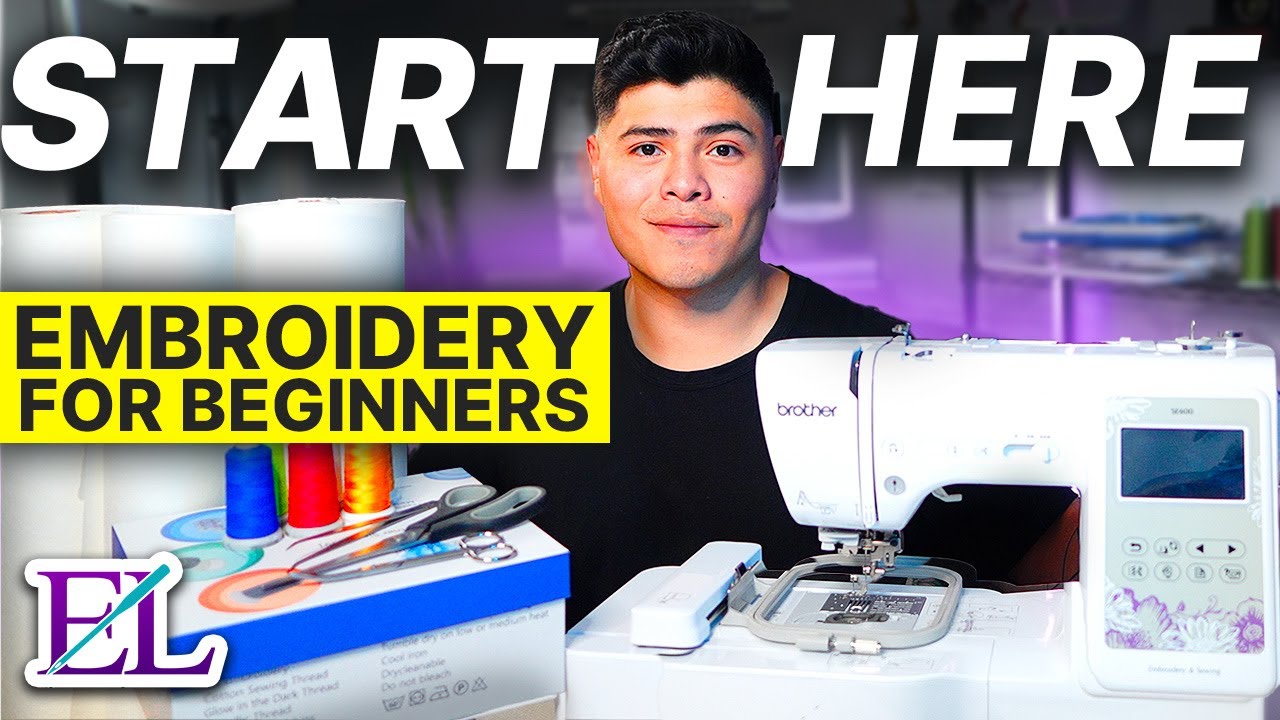
1. Introduction to Simple Machine Embroidery
Machine embroidery can feel like a maze for beginners—so many machines, a sea of threads, and a dizzying array of supplies. But here’s the secret: you don’t need a $5,000 best home embroidery machine or a mountain of gadgets to get started. With the right foundational techniques and a clear understanding of essential equipment, anyone can dive into this creative craft and produce stunning results right from home.
In this guide, we’ll unravel the basics: from choosing your first machine and understanding stabilizers, to prepping your fabric and stitching your very first design. Whether you’re an aspiring hobbyist or dreaming of launching a small embroidery business, you’ll find step-by-step advice, practical tips, and confidence-boosting insights. Let’s set aside the overwhelm and start stitching—one simple, satisfying project at a time.
Table of Contents
- 1. Introduction to Simple Machine Embroidery
- 2. Foundational Techniques for Beginners
- 3. Essential Equipment and Materials
- 4. Machine Selection: Single vs. Multi-Needle
- 5. Free-Motion Embroidery Alternatives
- 6. Digitization Basics for Beginners
- 7. Troubleshooting and Maintenance
- 8. Monetization Opportunities
- 9. Conclusion
- 10. FAQ
2. Foundational Techniques for Beginners
Embarking on your machine embroidery journey is a bit like learning to ride a bike—wobbly at first, but exhilarating once you get the hang of it. Let’s break down the core techniques and supplies you’ll need to get rolling.
2.1 Core Supplies and Machine Selection
Before you stitch your first masterpiece, you’ll need to gather a few essentials. Think of these as your embroidery starter kit:
-
Embroidery Machine:
- Embroidery-only machines are perfect if you want to focus solely on embroidery projects.
- Combo machines (sewing + embroidery) offer flexibility if you also plan to sew.
- Multi-needle machines are professional-grade and ideal for high-volume production, but beginners often start with single-needle models for their simplicity and affordability.
-
Stabilizers:
- Tear-away stabilizers are great for stable fabrics like cotton.
- Cut-away stabilizers work best with stretchy materials such as knits and sweatshirts.
- Water-soluble stabilizers are perfect for delicate fabrics or as a topping on textured surfaces like towels.
-
Threads:
- Most beginners use polyester embroidery thread for its strength and vibrant color range.
- Cotton thread is a solid choice for projects exposed to heat, like potholders.
- Don’t forget bobbin thread—usually in black or white, but it can be matched to your top thread.
-
Needles:
- The standard size for most projects is 75/11 embroidery needles. These have a sharp point and a larger eye to accommodate embroidery threads.
-
Hoops:
- Embroidery hoop frames keep your fabric taut and stable during stitching. Many machines come with at least one, but having a few sizes on hand (like 4x4 and 5x7 inches) gives you more creative freedom.
-
Other Tools:
- Sharp embroidery scissors, basting spray, and a USB stick for transferring designs are all handy additions.
When selecting your first machine, focus on practical features:
- Design placement tools help you align your patterns precisely.
- Automatic threaders and touchscreen interfaces make setup and operation much easier.
Pro Tip: Don’t get swept away by bells and whistles. Ask yourself, “How will this feature help me embroider my favorite projects better?” Community groups and online forums are gold mines for real-world advice on specific machine models.
2.2 Design Preparation and Fabric Setup
Now for the fun part—bringing your ideas to life!
-
Choosing Designs:
- Start with beginner-friendly formats like PES, DST, or JEF (check your machine’s compatibility).
- Opt for simple, low-color designs with clear outlines to avoid digitization headaches.
-
Fabric Selection:
- Cotton and polyester are forgiving for beginners. Save the stretchy or delicate fabrics for later adventures.
-
Hooping Techniques:
- Think of hooping like making a sandwich: stabilizer on the bottom, fabric on top, then secure both tightly in the hoop. The fabric should be taut like a drum—no wrinkles allowed!
- Use tear-away stabilizer for stable fabrics, and cut-away for anything with stretch.
-
Stabilizer Pairing:
- For towels or high-pile fabrics, add a water-soluble topping to keep stitches crisp and prevent them from sinking.
Pro Tip: Always pre-wash and shrink your fabric before embroidering garments to avoid puckering later. And don’t be afraid to test your setup on a scrap piece before tackling your main project.
2.3 Step-by-Step Embroidery Process
Ready to stitch? Here’s how a typical embroidery project unfolds:
-
Load Your Design:
- Transfer your chosen design to the machine via USB or compatible app. Adjust size and placement as needed.
-
Thread Preparation:
- Organize your threads in the order your design requires. Many modern machines will prompt you when it’s time to change colors.
-
Hoop and Position:
- Attach your hooped fabric to the machine, making sure it’s secure and aligned.
-
Start Stitching:
- Press start and let the machine work its magic. Stay nearby to change threads when prompted and keep an eye on the process.
-
Finishing Touches:
- Once stitching is complete, remove the hoop and carefully trim away excess stabilizer. For water-soluble types, a gentle rinse will do the trick.
-
Troubleshooting & Best Practices:
- Test designs on scrap fabric to check tension and stitch density.
- Use sharp needles and quality thread to minimize breakage.
- Clean your machine regularly to keep it running smoothly.
Remember: Every expert was once a beginner. Online tutorials, community forums, and a bit of patience will carry you far. Enjoy the process and celebrate every finished piece—no matter how small!
3. Essential Equipment and Materials
Building your embroidery toolkit doesn’t have to break the bank. Here’s how to make savvy choices and set yourself up for success from day one.
3.1 Budget-Friendly Machine Recommendations
Let’s talk machines—your creative workhorse. The good news? You don’t need to spend thousands to get started.
-
Brother PE535 / PE800:
- The Brother PE800 is a favorite among beginners for its 5x7-inch hoop size, user-friendly interface, and reliable performance. It’s embroidery-only, making it ideal if you’re focused on machine embroidery from the get-go.
- The PE535 offers a 4x4-inch hoop, which is great for smaller projects and tighter budgets.
-
Brother SE700 / SE2000:
- If you want a combo machine, the SE700 (4x4-inch hoop) and SE2000 (5x7-inch hoop) let you sew and embroider with one device. The SE2000, in particular, stands out for its larger hoop, automatic needle threading, and wireless design transfer via the ARTp app.
- Both models are praised for their built-in designs, intuitive controls, and affordable price points.
-
Multi-Needle Options:
- Multi-needle machines are best suited for those planning to scale up or run a small business. They’re faster and handle color changes automatically, but require a bigger investment and a steeper learning curve.
Cost-Performance Balance: Entry-level single-needle machines are perfect for hobbyists and those just starting out. As your skills and ambitions grow, you can always upgrade or add a multi-needle machine to your studio.
3.2 Stabilizers, Threads, and Hoops
The right materials are your secret weapon for pro-quality results—no matter your experience level.
| Type | Best For | Removal |
|---|---|---|
| Cut-away | Stretchy fabrics (t-shirts) | Trim excess |
| Tear-away | Stable fabrics (cotton) | Tear off |
| Wash-away | Delicate or textured fabrics | Rinse away |
| Topping | High-pile fabrics (towels) | Wash off |
Pro tip: No-show mesh cutaway is a favorite for lightweight shirts, as it prevents “shadowing” without adding bulk.
-
Threads:
- 40-weight polyester is the industry standard—strong, vibrant, and versatile.
- Brands like Exquisite, Floriani, Sulky, and Madeira are all solid picks.
- Pre-wound bobbins save time and keep your stitches consistent.
-
Needles:
- Stick with 75/11 embroidery needles for most projects. Keep extras on hand—broken or dull needles are part of the journey.
-
Hoops:
- A set of hoops in various sizes (4x4, 5x7, etc.) will cover most beginner projects.
- Multi-positional hoops allow you to stitch larger designs in sections.
- Magnetic embroidery hoops—such as those from MaggieFrame—are a game-changer for garment embroidery. They use powerful magnets for quick, even hooping, saving time and reducing fabric distortion. MaggieFrame hoops are known for their durability, easy operation, and compatibility with a wide range of machines, making them an excellent investment as your skills grow.
-
Other Handy Tools:
- Sharp scissors (including curved-tip for trimming threads), tweezers, basting spray, and a mini iron for appliqué work.
-
Fabric Selection:
- Cotton is beginner-friendly and forgiving.
- Polyester offers durability for high-wear items.
- Linen is elegant but trickier due to its loose weave.
-
Starter Kits:
- Consider kits that bundle stabilizers, threads, and needles to save money and simplify your shopping list.
Budget Tip: Don’t be lured by every gadget on the shelf—visit an embroidery supply store near me for essentials first.
Ready to start your embroidery adventure? Gather your supplies, pick a simple design, and let your creativity take flight. Every stitch is a step forward—so thread that needle and make something uniquely yours!
4. Machine Selection: Single vs. Multi-Needle
Choosing your first embroidery machine is a bit like picking your first car—should you go with the reliable compact or invest in the high-powered SUV? Let’s unravel the differences between single-needle and multi-needle embroidery machines, so you can match your ambitions (and your budget) to the right tool.4.1 Beginner Machines: Brother PE800 vs. SE600
When you’re just starting out, the Brother PE800 and SE600 are two of the most talked-about beginner machines—and for good reason. Both are single-needle machines, but they cater to slightly different needs. **Brother SE600** - **Type:** Combination sewing and embroidery - **Hoop Size:** 4" x 4" - **Built-in Designs:** 80, plus 6 fonts - **Key Features:** USB port for custom designs, automatic needle threader, and even free-motion sewing capabilities. The SE600 is a fantastic entry point if you want to dip your toes into both sewing and embroidery. Its 4x4 hoop size is perfect for monograms, small patches, and simple motifs. The built-in designs and fonts mean you can start creating right away, and the intuitive controls won’t leave you scratching your head. **Brother PE800** - **Type:** Embroidery-only - **Hoop Size:** 5" x 7" (the largest in its budget category) - **Built-in Designs:** 138, plus 11 fonts - **Key Features:** Drag-and-drop design editing, compatibility with free online fonts and designs. The PE800 steps things up with a larger embroidery area—think bigger designs for tote bags, back-of-shirt logos, or decorative pillow covers. It’s a workhorse for those ready to focus on embroidery, offering more built-in designs and a user-friendly interface.| Feature | Brother SE600 | Brother PE800 |
|---|---|---|
| Hoop Size | 4" x 4" | 5" x 7" |
| Sewing Function | Yes | No |
| Built-in Designs | 80 | 138 |
| Fonts | 6 | 11 |
| Editing Features | Basic | Drag-and-drop, resize |
| Price Range | ~$599 | ~$1,000 |
4.2 When to Consider Multi-Needle Machines
Let’s talk about the embroidery “power tools”: multi-needle embroidery machines. These are the heavyweights—designed for speed, efficiency, and tackling complex, multi-color designs without constant thread changes. **Who Needs a Multi-Needle Machine?** - **Commercial Users:** If you’re planning to run an embroidery business, take bulk orders, or need to stitch out dozens of items daily, a multi-needle machine like the Baby Lock Altair 2 or Janome MB-7 is a game-changer. - **Advanced Hobbyists:** If embroidery is more than a weekend hobby and you crave efficiency, multi-needle embroidery machines deliver speed and automation. **What Sets Them Apart?** - **Multiple Needles:** No more stopping to change threads—each needle holds a different color, so the machine can breeze through multi-color designs. - **Larger Embroidery Areas:** Some models offer massive hoops (up to 9.5" x 14"), letting you tackle jackets, quilts, and more. - **Higher Speed:** Typical multi-needle machines run at 800–1,200 stitches per minute, doubling or tripling your output compared to single-needle models. - **Advanced Features:** Automatic thread cutting, wireless design transfer, and precision placement apps are standard on high-end models. **Cost-Benefit Reality Check:** Multi-needle machines are a serious investment—think $5,000 and up. According to Sewing Report’s candid advice, these machines make sense only if you’re sure about your business plans and ready for the maintenance, learning curve, and upfront cost. For hobbyists or those just testing the embroidery waters, a single-needle machine is usually the smarter (and less stressful) choice. **Pro Tip:** If you’re tempted by used multi-needle machines, be cautious—maintenance and mechanical know-how become crucial. And always factor in the cost of supplies, software, and potential repairs.| Feature | Single-Needle | Multi-Needle |
|---|---|---|
| Embroidery Area | 4" x 4" to 5" x 7" | 9.5" x 14" and larger |
| Thread Changes | Manual | Automatic, multiple colors |
| Speed | 400–650 SPM | 800–1,200 SPM |
| Price Range | $450–$1,500 | $5,000–$10,000+ |
| Best For | Beginners, small projects | Commercial use, complex designs |
| Learning Curve | Low | High |
5. Free-Motion Embroidery Alternatives
What if you could turn your everyday sewing machine into a creative embroidery tool—no fancy gadgets required? Enter free-motion embroidery: the art of “drawing” with thread, using your hands and a regular sewing machine. **Why Free-Motion?** Free-motion embroidery is the ultimate playground for creativity. You’re not limited by pre-programmed patterns or expensive machines. Instead, you guide the fabric under the needle, sketching shapes, letters, or even entire scenes—just like doodling with a pen.Core Techniques and Setup
1. **Feed Dog Adjustment:** Lower the feed dogs (the little teeth under your fabric) to allow free movement in any direction. Most modern machines have a lever or digital setting for this. 2. **Stitch Length:** Set stitch length to zero or the lowest possible setting. This gives you full control over stitch placement. 3. **Presser Foot Options:** - *Free-Motion Foot (Darning Foot):* Offers stability and prevents fabric bounce. - *No Foot:* Advanced users sometimes go without a foot for maximum freedom, but beginners will find a free-motion foot much easier. 4. **Stabilization:** - Use an embroidery hoop to keep your fabric taut—think of it as your canvas frame. - Spray baste or lightweight interfacing can help prevent shifting, especially for quilting or appliqué.Key Tools and Equipment
| Component | Purpose |
|---|---|
| Free-Motion Foot | Minimizes bounce, improves consistency |
| Embroidery Hoop | Keeps fabric taut for smooth stitching |
| Stabilizers | Prevents shifting and puckering |
| Tailor’s Chalk | Marks guidelines on fabric |
Regular vs. Dedicated Embroidery Machines
| Aspect | Regular Sewing Machine | Dedicated Embroidery Machine |
|---|---|---|
| Pattern Flexibility | Unlimited, freehand | Preloaded or digitized patterns |
| Stitch Types | Mostly straight/zigzag | Multiple, automated |
| Cost | Low | High |
| Learning Curve | Manual skill needed | Automated, beginner-friendly |
Common Challenges and Solutions
- **Bobbin Thread Loops:** Adjust bobbin tension and use stabilizers; always test on scrap fabric first. - **Stitch Inconsistency:** Double-check feed dog position and stitch length. - **Fabric Movement:** Use a hoop and adjust presser foot pressure if needed.Best Practices for Beginners
- **Practice First:** Test your setup on scraps before tackling your main project. - **Start Simple:** Begin with basic shapes—lines, loops, waves—before advancing to intricate designs. - **Use Guidelines:** Mark your design with tailor’s chalk or fabric markers to keep your stitching on track. **Wardrobe School’s Take:** You don’t need a brand-new or high-end machine; even vintage models can handle free-motion embroidery. The key is to experiment, adjust tension, and have fun—mistakes are just part of the learning curve. **Curiosity Gap:** Ever wondered if your grandmother’s old sewing machine could create modern textile art? With free machine embroidery, the answer is a resounding “yes”—sometimes, those vintage workhorses outperform the latest tech!6. Digitization Basics for Beginners
Digitization might sound intimidating, but it’s simply the process of turning artwork into a format your embroidery machine can read. The good news? You don’t need expensive software or years of experience to get started.
6.1 Software-Free Design Adaptation
Many beginner-friendly machines come with built-in editing features that let you adapt and customize designs right on the screen—no extra software required.
Machine-Based Editing Features:
- Resize and Rotate: Adjust the size or orientation of your design to fit your project or hoop.
- Group/Ungroup: Separate design elements to move or modify them individually.
- Stitch Length/Width Controls: Fine-tune how your stitches look for different effects.
- Hoop Size Adjustment: Make sure your design fits your chosen hoop (e.g., 4x4 or 5x7 inches).
Manual Tracing: If you want to create something from scratch, some machines (and basic software) let you trace artwork using simple tools—think “draw with thread.” You can outline shapes, fill areas, and play with stitch angles for texture.
Embrilliance and Design Doodler: Use a digitizing program for embroidery machines like Embrilliance and Embroidery Legacy’s Design Doodler offer auto-digitizing and manual editing without a steep learning curve. You can import a JPG or PNG, trace outlines, assign colors, and preview the stitching sequence before sending it to your machine.
Workflow Example:
- Import your artwork (JPG/PNG) into the machine or software.
- Trace outlines and fill areas with stitches.
- Adjust colors, sequence, and stitch direction for best results.
- Test on scrap fabric and refine as needed.
6.2 Workflow Optimization Tips
Digitization isn’t just about making a design stitchable—it’s about making it stitch well. Here’s how to streamline your process and avoid common pitfalls:
- Color Management: Match thread colors to Pantone codes or use thread guides for consistency. Assign color changes efficiently to minimize thread swaps.
- Stitch Sequencing: Plan the order of stitching to reduce unnecessary jumps and trims—start with large areas, then add details.
- Testing Protocols: Always do a test stitch on similar fabric to check for density, tension, and color accuracy. Adjust underlay stitches and angles as needed.
- Preview Designs: Use software simulations to catch errors before you stitch. Many machines also let you preview the stitching path on the screen.
Pro Tip: Underlay stitches stabilize your fabric for dense fills or satin stitches—don’t skip them! And always save your work frequently during the digitization process.
Curiosity Gap: Think digitizing is only for tech wizards? With today’s beginner-friendly tools, you can adapt, personalize, and even create your own embroidery art—no coding or advanced software required.
Ready to take your embroidery to the next level? Whether you’re choosing your first machine, exploring free-motion artistry, or dipping your toes into digitization, remember: every masterpiece starts with a single stitch. So experiment, practice, and let your creativity shine—your next favorite project is just a thread away!
7. Troubleshooting and Maintenance
Embroidery isn’t always smooth sailing—sometimes, your machine throws a tantrum just when you’re in the creative zone. Fear not! With a little troubleshooting know-how and regular TLC, you can keep your stitches flawless and your machine humming along for years to come.
7.1 Solving Common Stitching Issues
Let’s face it: nothing kills embroidery joy faster than broken threads, tension drama, or puckered fabric. Here’s your go-to guide for tackling the most common machine embroidery headaches, so you can get back to stitching with confidence.
Thread Breakage
Ever had your thread snap mid-design? It’s a universal frustration. Here’s what to check:
| Cause | Solution |
|---|---|
| Improper threading | Re-thread the machine, making sure the thread passes through every guide. |
| Poor thread quality | Use high-quality embroidery thread suited to your fabric and machine. |
| Incorrect tension | Adjust both top and bobbin tension as per your manual’s guidance. |
| Burrs or metal imperfections | Inspect the needle plate and parts for rough spots; replace if needed. |
| Picker misalignment | Adjust the picker arm to keep the thread from popping out of the needle. |
Pro Tips:
- Replace dull or bent needles regularly.
- Clean out lint and debris—tiny snags can cause big problems.
Tension Errors
If your stitches look loopy, uneven, or just plain wrong, tension is often the culprit.
| Problem | Cause | Solution |
|---|---|---|
| Thread looping | Incorrect tension/threading | Re-thread and adjust tension dials |
| Skipped stitches | Over-tightened threads | Lower tension; check threading |
| Pulled threads | Excessive fabric tension | Reduce pressure; check threading |
Quick Test: Gently pull the thread—it should resist slightly, but not snap. If you’re unsure, consult your machine’s manual for model-specific advice.
Fabric Puckering
Nothing ruins a project like puckering. Here’s how to smooth things out:
| Cause | Solution |
|---|---|
| Over-tensioned fabric | Lower the tension knob until puckering disappears. |
| Incorrect threading | Double-check your fabric and hoop alignment. |
Prevention:
- Use stabilizers (like interfacing) for delicate fabrics.
- Don’t stretch fabric when hooping—keep it taut, not tight.
Skipped Stitches
Skipped stitches can sneak up on you, but they’re usually easy to fix:
| Factor | Action |
|---|---|
| Dull/damaged needles | Swap in a fresh needle suited to your fabric. |
| Wrong needle size | Match needle size to thread weight (75/11 is standard). |
| Design errors | Double-check your embroidery file and re-upload. |
Quick Fixes:
- Pause and re-thread the machine.
- Clean the hook assembly to ensure smooth stitch formation.
Troubleshooting Reference Table
| Issue | Likely Cause | Immediate Action |
|---|---|---|
| Thread breakage | Threading, burrs, high tension | Re-thread, inspect for burrs, adjust tension |
| Skipped stitches | Dull needle, design errors | Replace needle, verify design |
| Fabric puckering | Over-tensioned fabric | Lower tension, recheck threading |
| Excessive noise | Lack of lubrication/debris | Clean and oil moving parts |
Expert Recommendations:
- Preventive Maintenance: Clean your machine regularly and lubricate as recommended.
- Quality Control: Use threads and needles suited to your fabric, and always test on scraps first.
- Documentation: Keep a troubleshooting log—patterns emerge, and solutions get easier!
Why MaggieFrame Hoops Make a Difference: When it comes to garment embroidery, maintaining even fabric tension is half the battle. Magnetic embroidery hoops like MaggieFrame offer a game-changing advantage. Their powerful magnetic system ensures consistent, even tension across your fabric, dramatically reducing issues like puckering and thread breaks. The easy, secure hooping process means fewer headaches and more beautiful results—especially for beginners or anyone tackling high-volume projects.
7.2 Machine Care for Longevity
Your embroidery machine is the heart of your creative setup—treat it well, and it’ll reward you with years of smooth operation. Here’s how to keep things running like new:
Daily/Weekly Cleaning Routines:
- Remove lint and dust from the bobbin area, needle plate, and thread path after every project.
- Use a soft brush or compressed air (sparingly) to clear stubborn debris.
- Wipe down the exterior and keep your workspace tidy.
Lubrication Schedules:
- Refer to your machine’s manual for oiling points and frequency—over-oiling can attract lint, while under-oiling leads to wear.
- Use only manufacturer-recommended lubricants.
Calibration Checks:
- Check thread tension and stitch quality before starting new projects.
- Listen for unusual noises—squeaks or grinding may signal the need for a tune-up.
Pro Tips:
- Change needles regularly—don’t wait for a break!
- Schedule professional embroidery machine repair servicing annually, especially if you use your machine frequently.
- Keep a maintenance log to track cleaning, oiling, and any issues.
A little routine care goes a long way—think of it as giving your machine a spa day. The result? Fewer breakdowns, better stitches, and a happier creative journey.
8. Monetization Opportunities
Ready to turn your embroidery passion into profit? The embroidery market is thriving, with global revenues projected to grow from $5.90 billion in 2025 to $7.88 billion by 2034. But the real magic happens when you carve out your own niche. Let’s explore the most lucrative opportunities and how to make your mark.
High-Potential Niches
1. Custom Apparel and Accessories
- Baby & Children’s Products: Personalized bibs, blankets, and clothing are always in demand—think baby showers, birthdays, and keepsake gifts. Parents love unique, non-toxic items that stand out from mass-produced options.
- Pet Accessories: Custom collars, bandanas, and blankets for furry friends are a hit, especially on platforms like Etsy. Pet owners are eager to invest in personalized, pet-friendly products.
- Branded/Corporate Apparel: From team uniforms to event merchandise, businesses seek bulk orders for logos and branding. Digital embroidery machines make it easy to scale up while maintaining quality.
2. Home Décor and Lifestyle Products
- Embroidered Textiles: Cushions, wall art, table linens, and seasonal décor offer endless creative possibilities. Eco-friendly materials and cultural motifs can help you stand out in a crowded market.
- 3D Embroidery and Appliqué: High-end, textured designs are gaining traction—think luxury home goods or sports jerseys. Advanced machines with 3D capabilities can set your offerings apart.
Trends and Strategies
| Factor | Impact on Business |
|---|---|
| AI/ML Integration | Enables error detection, design optimization, and predictive maintenance. |
| IoT Connectivity | Supports cloud-based design storage and remote machine monitoring. |
| Sustainability Focus | Eco-friendly materials and ethical production attract conscious consumers. |
| Regional Growth | Asia Pacific leads, but U.S. 3D/appliqué services are rising. |
Strategic Moves: 1. Leverage E-Commerce: Sell on Etsy, Shopify, or niche marketplaces. Use Instagram and TikTok for visual storytelling and to build your brand’s personality.
2. Adopt Advanced Machinery: Invest in machines with 3D or AI-driven features to boost productivity and quality.
3. Focus on Niche Markets: Baby and pet products offer high margins and recurring demand. Corporate clients value fast, reliable turnaround.
4. Sustainability Marketing: Highlight your use of eco-friendly materials and ethical practices to win over conscious shoppers.
Challenges and Solutions
| Challenge | Solution |
|---|---|
| High Production Costs | Automate workflows, target premium pricing for custom designs. |
| Market Saturation | Differentiate with unique designs, subscription models, or B2B partnerships. |
Real-World Inspiration: Etsy is full of success stories—creators who started with a single niche (like baby blankets or pet bandanas) and grew into thriving businesses by focusing on quality, storytelling, and customer connection. One creator pivoted from children’s clothing to custom corporate apparel, finding greater satisfaction and profitability in logo work.
Curiosity Gap: What’s the next embroidery trend? Maybe it’s personalized wedding veils, custom varsity jackets, or embroidered wall art. The only limit is your imagination—and your willingness to experiment.
9. Conclusion
Machine embroidery doesn't have to be overwhelming. Start simple, master the basics, and let your creativity lead the way. With the right foundational skills and a focus on quality, you'll gain the confidence to tackle bigger projects—and maybe even build a business.
Remember: every embroidery pro was once a beginner. Embrace the learning curve, experiment with new ideas, and don't be afraid to make mistakes. Whether you're stitching for fun or profit, the joy is in the journey—and every finished piece is a victory.
Ready to thread your next adventure? Grab your supplies, pick a project, and start stitching. Your embroidery story is just beginning!
10. FAQ
10.1 Q: What’s the difference between cut-away, tear-away, and wash-away stabilizers? How do I choose the right one?
A: Cut-away stabilizers are best for stretchy fabrics like t-shirts and sweatshirts—they provide long-term support and remain in the garment after stitching. Tear-away stabilizers work well with stable, non-stretch fabrics such as cotton or canvas; you simply tear them away after embroidery. Wash-away stabilizers dissolve in water and are ideal for delicate fabrics, lace, or as a topping on textured surfaces like towels to prevent stitches from sinking. When choosing, consider your fabric type and the demands of your design: stretchy or lightweight fabrics often need cut-away, while stable fabrics can use tear-away. For textured or delicate projects, add a wash-away topping for crisp results.
10.2 Q: What type and weight of thread should I use for machine embroidery?
A: The most common thread for machine embroidery is 40-weight polyester. It’s strong, vibrant, and resists fading—making it a go-to for most projects. Cotton thread is a great alternative for items exposed to high heat, like potholders, since polyester can shrink or melt under extreme temperatures. Bobbin thread is usually lighter (often 60-weight) and comes in black or white, but you can match it to your top thread if needed. Always use thread specifically designed for machine embroidery to avoid breakage and tension issues.
10.3 Q: How do I prevent puckering or distortion in my embroidery projects?
A: Puckering often results from incorrect stabilizer choice, poor hooping, or excessive thread tension. To prevent it, select the right stabilizer for your fabric, ensure your fabric is hooped taut (like a drum—no wrinkles!), and avoid overstretching when hooping. Pre-wash and pre-shrink garments before embroidering, especially if they’re prone to shrinkage. Adjust thread tension so that only the upper thread shows on top and the bobbin thread on the underside. Testing your setup on a scrap piece before starting your main project is always a smart move.
10.4 Q: How often should I change my embroidery needle, and what size is best for beginners?
A: For most machine embroidery projects, a 75/11 embroidery needle is standard. Change your needle regularly—after every 8–10 hours of stitching or when you notice skipped stitches, fraying, or dullness. Using a fresh, sharp needle helps prevent thread breaks and ensures clean, precise stitches. Always match your needle type and size to your fabric and thread for best results.
10.5 Q: What’s the best way to maintain my embroidery machine for longevity?
A: Regular maintenance is key! Clean lint and dust from the bobbin area, needle plate, and thread path after every project. Use a soft brush or compressed air (sparingly) to remove debris. Follow your machine’s manual for oiling frequency and locations—using only recommended lubricants. Change needles often and check tension before each project. Schedule professional servicing annually, especially if you embroider frequently. Keeping a maintenance log can help you stay on top of routine care and catch issues early.
10.6 Q: Can I use any design file for machine embroidery, or does it need to be a specific format?
A: Embroidery machines require designs in specific file formats, such as PES, DST, or JEF—depending on your machine brand. You can’t use regular image files (like JPG or PNG) directly; designs must be digitized for embroidery. Many machines come with built-in designs, and you can purchase or download digitized files online. Always check your machine’s compatibility before uploading a new design.
10.7 Q: How do I troubleshoot thread breaks and tension errors?
A: Thread breaks and tension issues are common, especially for beginners. If your thread snaps, check that your machine is threaded correctly, use high-quality embroidery thread, and adjust both top and bobbin tension as needed. Replace dull or bent needles, and inspect for burrs or rough spots on the needle plate. For tension errors—like looping or uneven stitches—re-thread your machine and adjust tension dials incrementally. Consult your manual for model-specific guidance, and don’t hesitate to test on scrap fabric first.
10.8 Q: Is it necessary to use pre-wound bobbins, or can I wind my own?
A: You can do either! Pre-wound bobbins are convenient and save time, ensuring consistent tension and stitch quality. If you prefer, you can wind your own bobbins—just make sure to use the correct bobbin size and compatible thread weight for your machine. Whichever method you choose, always check that the bobbin is wound evenly and inserted correctly.
10.9 Q: What are some beginner-friendly ways to practice machine embroidery?
A: Start with simple, low-color-count designs on stable fabrics like cotton. Use basic shapes, monograms, or outline patterns to build confidence. Practice hooping, threading, and tension adjustments on scrap fabric before tackling your main project. Many embroidery machines include built-in tutorials or step-by-step guides—take advantage of these resources. Online communities and video tutorials can also provide inspiration and troubleshooting support as you learn.
10.10 Q: Do I need expensive equipment or software to get started with machine embroidery?
A: Not at all! Many beginners start with affordable single-needle machines and basic supplies. Entry-level models often include built-in designs and user-friendly features. You don’t need professional digitizing software right away—most machines let you resize, rotate, and combine designs on-screen. As your skills grow, you can explore more advanced tools and accessories, but starting simple is the best way to build a strong foundation.
Have more questions? Don’t hesitate to join embroidery forums, watch beginner tutorials, or reach out to your machine’s support community. Every embroidery pro started with the basics—your creative journey is just beginning!