
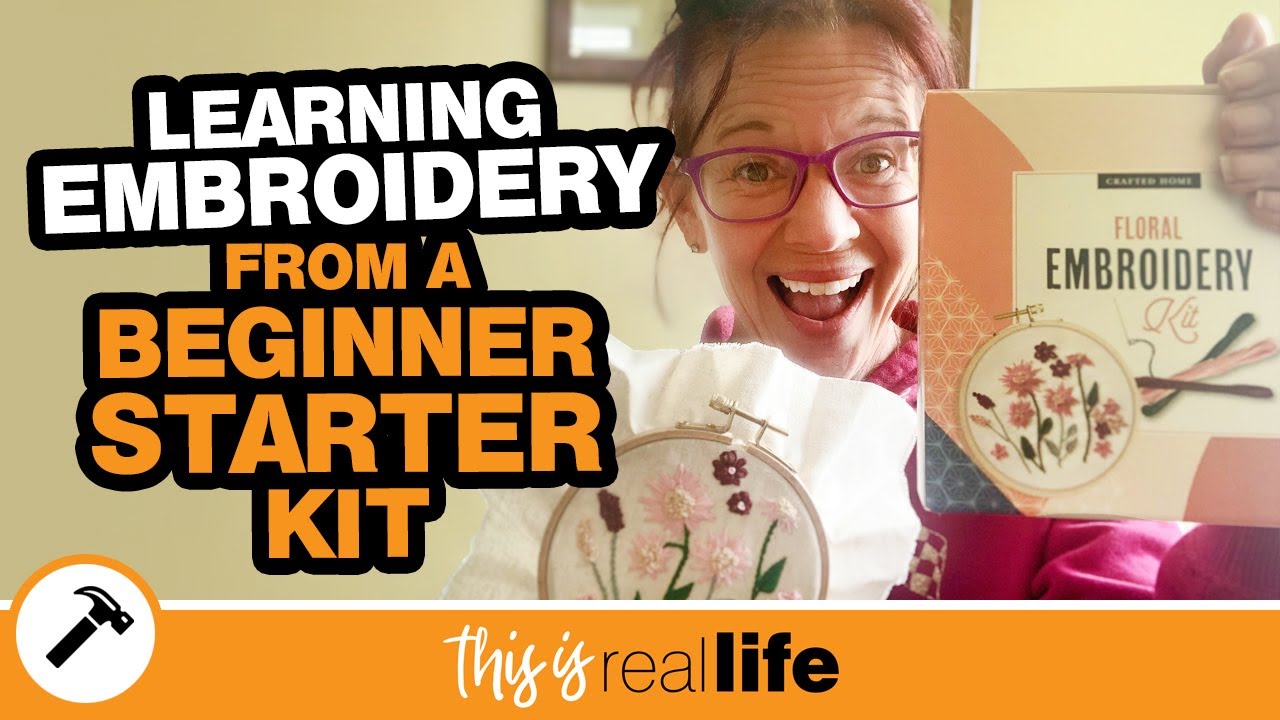
1. Introduction to Embroidery for Absolute Beginners
Embroidery isn't just for grandmas or museum walls—it's an accessible, creative escape for anyone, no matter your age or experience, using a good beginner embroidery machine. If you've ever found yourself mesmerized by colorful stitches or wondered how to bring a simple piece of fabric to life, you're in the right place. This guide is designed to walk you through every step of your embroidery journey: from picking your very first kit, to mastering foundational stitches, to completing your first project with confidence. We'll cover how to choose the right starter kit, break down basic techniques, provide project inspiration, and offer troubleshooting tips for common hiccups. Ready to swap screen time for stitch time? Let's dive in and discover the relaxing, rewarding world of embroidery—one stitch at a time.
Table of Contents
- 1. Introduction to Embroidery for Absolute Beginners
- 2. Choosing Your First Embroidery Kit: Features and Value
- 3. Mastering Foundational Embroidery Stitches
- 4. Simple Project Ideas to Build Confidence
- 5. Project Lifecycle: Time Investment to Finished Creation
- 6. Troubleshooting Common Beginner Mistakes
- 7. Beyond Kits: Designing and Sourcing Your Own Projects
- 8. Conclusion: Your Journey Starts Here
- 9. Beginner Embroidery FAQ
2. Choosing Your First Embroidery Kit: Features and Value
Selecting your first embroidery kit can feel like stepping into a candy store—so many colors, patterns, and promises! But not all kits are created equal. Let’s unravel what makes a beginner kit truly beginner-friendly and worth your investment.
2.1 Essential Components of a Quality Starter Kit
A great embroidery kit for beginners is more than just a pretty box. Here’s what you should look for:
- Hoops: Quality kits include sturdy hoops, often made from bamboo or beechwood. These natural materials offer durability and a comfortable grip, unlike plastic hoops that may warp or slip. Kits like Craftwiz and DIY Embroidery Kit feature bamboo or beechwood hoops, providing a stable foundation for your stitches.
- Fabric: Pre-printed cotton fabric is a game-changer for novices. Look for 100% cotton (such as Kona cotton or cotton muslin), which is forgiving and easy to work with. Avoid synthetic fabrics like polyester—they can be slippery and less enjoyable to stitch.
- Threads: High-quality, non-fading cotton threads are essential. Kits may use branded floss like DMC, known for vibrant colors and smooth texture. Some budget kits (e.g., Akacraft) offer soft, bright threads, while premium options stick to DMC for consistency.
- Needles: Expect both blunt and pointy-tipped needles for various stitch types. Having a couple on hand is helpful if you want to experiment with different thread thicknesses.
- Instructions: Clear, step-by-step guides—ideally with illustrations or access to video tutorials—are invaluable. Kits that include booklets or QR codes to online videos (like Craftwiz) make learning less intimidating.
- Extras: Scissors, threaders, and even practice fabric are thoughtful additions found in some kits.
Material Quality Matters: Perplexity research and top kit reviews agree: Kona cotton and DMC floss are gold standards for fabric and thread. Wooden or beechwood hoops hold up better than plastic, and pre-printed patterns help you focus on stitching, not tracing.
2.2 Top 5 Beginner Kits Compared: Price vs. Performance
Not sure which kit to pick? Here’s a quick comparison of popular beginner kits, blending Perplexity data and real user feedback:
| Kit | Pros | Cons | Price Range |
|---|---|---|---|
| Akacraft DIY Kit | Non-fading threads, water-soluble pattern, good booklet | Non-DMC threads, time-intensive (6-8 hrs) | Mid-range |
| Unime Starter Kit | Budget-friendly, 50+ threads, washable patterns | Poor instructions, plastic hoop | Budget |
| Craftwiz 4-Set Kit | Bamboo hoop, 29 stitches, video tutorials, gift packaging | Limited fabric options (4 pre-printed cloths) | Mid-range |
| DIY Embroidery Kit | DMC floss, Kona cotton, beechwood hoop, detailed guide | Higher cost due to premium materials | Premium |
| Sunday Mornings Kit | Compact, basic tools, clear instructions | Smaller hoop size, fewer extras | Budget |
- Best Overall: Akacraft DIY Kit balances quality and beginner guidance.
- Best Budget: Unime Starter Kit offers affordability and thread variety.
- Best for Learning: Craftwiz 4-Set Kit stands out for its instructional support.
- Best Materials: DIY Embroidery Kit delivers premium fabric and thread.
Pro Tip: For your first project, prioritize kits with 100% cotton fabric, wooden hoops, and clear instructions. Don’t be lured by flashy extras if the basics aren’t solid.
2.3 Evaluating Long-Term Value: Materials and Durability
A kit’s value isn’t just about what’s inside the box—it’s about how long those materials last and how enjoyable they are to use. Here’s how to spot a kit that will grow with you:
- Fabric Longevity: 100% cotton (especially Kona cotton) resists stretching and holds up to repeated stitching and washing. Avoid synthetics, which can pill or distort.
- Hoop Material: Wooden and beechwood hoops outlast plastic, staying true to shape even after many projects.
- Thread Quality: DMC and similar high-grade flosses won’t fade or fray easily, keeping your finished piece vibrant.
- Instructional Support: Kits with video tutorials or detailed guides help you learn skills you’ll use beyond your first project.
For Garment Embroidery: If you plan to embroider clothing, consider upgrading to an embroidery hooping station with magnetic hoops. Magnetic hoops provide even tension, reduce puckering, and make hooping thicker fabrics a breeze—saving you time and frustration as you level up your embroidery game.
3. Mastering Foundational Embroidery Stitches
Now that you’ve got your kit, it’s time to thread your needle and make some magic. Mastering a few basic stitches is the secret to unlocking a world of creative possibilities.
3.1 Step-by-Step: Running Stitch and Backstitch
Let’s start with the essentials—these stitches are the bread and butter of embroidery, perfect for outlines, text, and simple designs.
Running Stitch (Straight Stitch):- Purpose: Outlining, filling, and creating basic lines.
-
How-To:
- Separate 2-3 strands of embroidery floss and thread your needle.
- Bring the needle up at your starting point, leaving a small knot at the back.
- Insert the needle back down about 1/4 inch away, creating a straight line.
- Repeat, keeping your stitch lengths consistent for a neat look.
- Secure the thread by weaving it through the back of your stitches.
- Pro Tip: Adjust stitch length for curves—shorter stitches make smoother lines.
- Purpose: Creating solid lines, text, and outlines.
-
How-To:
- Use 2-3 strands of floss, knotting the end.
- Bring the needle up at the start of your design.
- Insert the needle back down a short distance away, then bring it up further along the line.
- Go back down at the end of the previous stitch, “backtracking” to connect each stitch.
- Secure the thread as before.
- Pro Tip: For text or curves, use shorter stitches for greater control.
- Tangled Thread: Cut shorter lengths and separate strands gently.
- Uneven Stitches: Practice on scrap fabric and focus on keeping spacing consistent.
YouTube tutorials and kit instructions often demonstrate these stitches visually—don’t hesitate to pause and replay as you learn. Remember, each stitch is like a brushstroke; with practice, your lines will become smoother and more confident.
3.2 French Knots and Beyond: Adding Texture
Ready to add some dimension? French knots are your ticket to textured centers, polka dots, and more.
French Knot:- Purpose: Adding texture, dots, or flower centers.
-
How-To:
- Use 1-2 strands of floss, knotting the end.
- Bring the needle up at the desired spot.
- Wrap the thread around the needle 2-3 times.
- Insert the needle back down close to where it came up (but not in the same hole).
- Pull the thread tight to form a neat knot.
- Secure at the back.
- Loose Knots: Keep the thread taut as you pull the needle through.
- Knots Pulling Through: Make sure you insert the needle slightly away from the original entry point.
Once you’re comfortable, explore stitches like the lazy daisy, satin stitch, and fishbone stitch. Many starter kits include visual guides, and YouTube creators like Sarah Milligan break down each technique with step-by-step demos. Practice on extra fabric before tackling your main project—think of it as doodling before painting a masterpiece.
Final Encouragement:Don’t worry if your first stitches aren’t perfect. Every embroidery journey starts with a single stitch—and a little curiosity. Embrace the process, enjoy the meditative rhythm, and celebrate each small win along the way. Your creative adventure is just beginning!
4. Simple Project Ideas to Build Confidence
Embroidery can feel daunting at first, but the secret to building confidence is starting small—with projects that deliver quick wins and visual delight. Let’s explore two beginner-friendly directions: organic floral patterns and playful motifs.
4.1 Floral Patterns: Organic Shapes for Easy Practice
Floral embroidery is a beginner’s best friend. Why? Organic shapes like petals and leaves are forgiving—if your stitch wobbles or your spacing isn’t perfect, it just adds to the natural charm. Plus, floral designs let you experiment with color and texture while practicing foundational stitches.
Go-To Stitches for Florals:
- Lazy Daisy: Perfect for petals and leaves, this looped stitch creates soft, rounded shapes.
- Satin Stitch: Fills in flower centers or plump petals with smooth, solid color.
- Backstitch: Outlines stems and details, anchoring your design.
- Woven Wheel: Adds dimension to flower centers for that “pop” of texture.
Free & Affordable Patterns to Try:
- Bouquet Embroidery Pattern (Why Not Stitching): Comes with a stitching guide and video tutorial—ideal for visual learners.
- Bumblebee Blooms (ByAlyPloof): Features vibrant colors and a handy stitch library.
- Simple Flowers Embroidery Pattern (Jessica Long): A 5-inch hoop design with a beginner guide, color key, and DMC floss recommendations.
- Alice’s Garden (Little Dorrit and Co.): A structured, free floral pattern—great for first-timers.
Platforms like LoveCrafts and Cutesy Crafts offer extensive collections, including roses, sunflowers, and daisies—including machine embroidery designs free downloads. Over half of 35+ available floral patterns require no purchase, making it easy to start without breaking the bank.
Project Possibilities:
| Project Type | Description |
|---|---|
| Wall Art | Frame circular or linear floral motifs for instant décor. |
| Clothing Embellishment | Add daisies or tulips to jeans using backstitch and satin stitch. |
| Jewelry | Shrink flower designs for embroidered earrings or pendants. |
| Stitch-Alongs | Join guided tutorials (like a 7-flower series) for step-by-step learning. |
Learning Resources:
- Many kits and online patterns include video tutorials and illustrated guides.
- Social media hashtags like #diyembroidery and #diyjeans are goldmines for inspiration and community feedback.
Pro Tip: Start with a small hoop (4–6 inches) and a simple pattern. The organic shapes of florals help you relax and enjoy the process—mistakes blend right in!
4.2 Quick-Win Motifs: Animals, Hearts, and Geometrics
Not feeling floral? No problem! Simple motifs—think animals, hearts, and geometric shapes—are equally beginner-friendly and just as satisfying.
Why Simple Motifs Work:
- Low Complexity: Designs like cats, dogs, hearts, and triangles rely on basic outlines and repetitive stitches.
- Skill Building: Practicing these shapes helps you master stitch consistency and tension without overwhelming detail.
- Instant Gratification: Projects can often be finished in a single sitting, boosting your confidence.
Popular Kit Motifs from Top-Ranked Sources:
- Animals: Cats, dogs, bees, and birds are common in beginner kits from Etsy and Michaels.
- Hearts & Stars: Great for learning satin stitch and backstitch.
- Geometrics: Triangles, diamonds, and circles offer a modern twist and teach spacing.
Creative Uses:
- Turn finished motifs into patches, ornaments, or even tiny framed gifts.
- Mix and match shapes to create your own sampler.
Encouragement: Every completed motif is a mini-milestone. As YouTube beginners share, even a tiny project can transform a stressful day into a relaxing, creative escape. So pick a motif that sparks joy, thread your needle, and let your imagination lead the way!
5. Project Lifecycle: Time Investment to Finished Creation
Embroidery isn’t just about the final product—it’s about the journey from blank fabric to finished art. Understanding project timelines and creative display options helps you set realistic expectations and savor every stitch.
5.1 Realistic Timeframes for Small Projects
How long does a beginner embroidery project actually take? Here’s what the data—and real-life stitchers—suggest:
| Project Size | Typical Duration (Hand Embroidery) |
|---|---|
| Small hoops (4–6") | 2–5 hours for basic designs |
| Moderate motifs | 3–10 hours (more colors or detail) |
| Large projects | 10–15 hours or more |
Key Factors Affecting Speed:
- Design Complexity: Simple outlines (like monograms) can be stitched in 30 minutes to 1 hour, while intricate florals or detailed lettering may stretch to 10+ hours.
- Stitch Type: Running stitch and backstitch are quick; satin stitch and French knots take longer.
- Skill Level: Beginners may spend extra time mastering foundational techniques, but speed increases with practice.
Therapeutic Benefits: Embroidery is more than a craft—it’s a meditative, sensory experience. The rhythmic motion of stitching, choosing colors, and feeling fabric beneath your fingers fosters mindfulness and reduces stress. Many beginners find themselves "hooked" after their first project, not just for the art, but for the calm it brings.
Real-World Example: A YouTube beginner completed a small floral kit in about three hours, describing the process as "super easy and very relaxing." Others report finishing two small kits in a couple of weeks, working in the evenings.
Pro Tip: Don’t rush. Let each session be a mini retreat from your day. As your skills grow, you’ll find your pace naturally quickens—and your confidence soars.
5.2 Displaying and Gifting Your Finished Work
You’ve finished your first embroidery—now what? The possibilities are as creative as your stitches.
Framing Techniques:
-
Foam Core Mounting:
- Stretch your embroidery over foam core, secure the edges, and pop it in a standard frame (no glass needed).
-
Hoop Framing:
- Leave your work in the embroidery hoop for a rustic, handmade display. This is especially popular for small projects.
-
Canvas Mounting:
- Stretch your piece over a blank art canvas for a modern, gallery-style look.
Creative Display Ideas:
| Application | Description |
|---|---|
| Wall Hangings | Use hoops or frames, or sew pieces into fabric banners. |
| Home Decor | Attach embroidery to pillows, tote bags, or lampshades. |
| Wearable Art | Add stitched motifs to jackets, patches, or bracelets. |
| Ornaments | Turn small pieces into Christmas ornaments or gift tags. |
Gifting Inspiration:
- Personalize linens, tote bags, or baby blankets with embroidered names or dates.
- Create DIY kits for friends—include pre-printed fabric, floss, and a hoop.
- Offer your finished piece as wall art, coasters, or table runners.
Beginner-Friendly Kits for Gifting: Some kits, like the Spiral Sampler, include materials and reusable patterns, making it easy to create multiple gifts or keepsakes.
Trends to Watch: Sustainability is in—repurpose embroidery into functional items, and look for kits with water-soluble or PDF patterns for maximum flexibility.
Final Thought: Every finished piece is a story—of your patience, creativity, and growth. Whether you frame it, gift it, or keep it as a memento, your embroidery is a testament to your new skills.
6. Troubleshooting Common Beginner Mistakes
Every embroidery journey has its hiccups. The good news? Most beginner mistakes are easy to fix with a few practical adjustments. Let’s tackle the most common issues and how to overcome them—so frustration never stands between you and your next masterpiece.
6.1 Solving Thread Tangles and Tension Imbalances
Why does my thread keep tangling? Why do my stitches look uneven? These are classic beginner questions—and you’re not alone!
Common Causes:
- Incorrect upper/lower thread tension
- Mismatched thread weights
- Improper needle selection or dull needles
Actionable Fixes:
- Adjust Tension: Start with a middle tension setting (4–5 on most machines) and fine-tune until your stitches interlock in the fabric’s center. For hand embroidery, keep your thread length manageable (about 18 inches) and separate strands gently.
- Thread Ratio: Aim for a 1/3 bobbin to 2/3 top thread ratio for balanced stitches (especially on machines).
- Thread Quality: Use high-quality threads (polyester or rayon for machine embroidery; DMC or similar for handwork) that match your fabric’s weight.
- Needle Maintenance: Replace needles every 8 hours of stitching, or whenever you notice uneven stitches or snags. Use ball-point needles for knits and sharp needles for wovens.
For Garment Embroidery: If you’re moving onto clothing projects, consider embroidery machine hoops like MaggieFrame magnetic system. Their even tension and strong grip help prevent distortion and thread slippage, making your stitching smoother and more professional.
Quick Checklist:
- Double-check your thread path—no snags or missed guides.
- Use the right needle for your fabric.
- Keep thread lengths short to avoid tangles.
6.2 Preventing Fabric Puckering and Misalignment
Why is my fabric puckering? Why does my design look crooked? Puckering and misalignment can turn a promising project into a source of frustration, but a few tweaks can make all the difference.
Key Causes:
- Not using the right stabilizer
- Improper hooping technique
- High stitch density or poor design placement
How to Fix:
| Stabilizer Type | Best For |
|---|---|
| Tear-away | Stable cotton fabrics |
| Cut-away | Stretchy knits |
| Wash-away | Sheer/lace fabrics |
- Hooping Technique:
- Smooth fabric over the hoop without stretching it.
- Use adhesive spray for extra stability, especially on tricky fabrics.
- Avoid over-tightening—fabric should be taut, not drum-tight.
- Stitch Optimization:
- Reduce stitch density in your design.
- Minimize underlay stitches.
- Embroider from the center outward to minimize distortion.
- Test First: Always try your design on scrap fabric before committing to your main project. This helps you catch issues before they happen.
- Alignment Tools: Use templates or grid lines to position your design accurately, and check your embroidery file for gaps or errors.
Pro Tip: Layer stabilizers for complex designs, and add a water-soluble topping for slippery fabrics.
Encouragement: Mistakes are part of the process. Each fix is a lesson learned, bringing you one step closer to embroidery confidence. So embrace the troubleshooting—it’s how every stitcher grows from beginner to pro!
7. Beyond Kits: Designing and Sourcing Your Own Projects
So, you’ve conquered your first embroidery kit, stitched your way through floral bouquets and geometric hearts, and now you’re itching for more creative freedom. Welcome to the next chapter of your embroidery journey—where you get to be the designer, the maker, and the curator of your own supplies. Let’s break down how to confidently transition from kit-based projects to self-designed masterpieces, and how to keep your hobby affordable and sustainable.
7.1 Transitioning to Original Patterns and Transfers
Moving beyond pre-printed kits is like stepping out of a coloring book and picking up your own sketchpad. The freedom is exhilarating—and maybe a little intimidating. But don’t worry, you don’t need to be a professional artist to create stunning, original embroidery.
Choosing Your Fabric
First things first: fabric.
- Cotton is your best friend—affordable, easy to work with, and forgiving for most stitches.
- Linen offers a beautiful, textured drape and is perfect for more detailed or heirloom projects.
- Evenweave fabrics (like Aida or Lugana) are ideal if you’re venturing into counted thread techniques.
Pro tip from both YouTube creators and seasoned stitchers: experiment with fabric scraps before committing to your main piece. It’s like a dress rehearsal for your design—no pressure, just play.
Pattern Creation and Transfer Methods
Now, let’s get your design onto the fabric. Here are some tried-and-true methods, each with its own personality:
| Method | Best For | Pros | Cons |
|---|---|---|---|
| Carbon Paper | Thick fabrics, detail | Crisp lines, minimal smudging | Permanent marks if not careful |
| Iron-On Pens | Smooth fabrics, bold | Quick, permanent, easy for repeats | Must mirror design, irreversible |
| Water Soluble Pen | Delicate/temporary | Washes out, precise | Fades over time, may need re-tracing |
| Friction Pen | Stretchy fabrics | Minimal smudging, easy to use | Limited availability |
How to Use Them:
- Carbon Paper: Place the carbon side down on your fabric, trace your design with a stylus, and secure the fabric in your hoop to keep things steady.
- Iron-On Pens: Trace your design on paper, flip it over, and iron it onto your fabric—just remember to mirror your image!
- Water Soluble Pens: Draw directly on your fabric, then rinse away the lines after stitching.
If you’re feeling techy, digitizer software for embroidery like Embrilliance let you digitize your designs for machine embroidery—perfect for those who want to scale up or experiment with intricate patterns.
Fabric & Stabilizer Pairings
The right stabilizer can make or break your project. Here’s a quick cheat sheet:
| Stabilizer Type | Fabric Use | Removal |
|---|---|---|
| Tear-Away | Cotton, linen | Peel manually |
| Water Soluble | Delicates, knits | Rinse in water |
| Fusible Polymesh | Stretchy fabrics | Leave in place |
Always test your transfer method and stabilizer on a scrap first—it’s embroidery’s version of “measure twice, cut once.”
Troubleshooting Common Pitfalls
- Smudging: Use a hoop to stabilize your fabric during transfers.
- Reversed Designs: Mirror your pattern before using iron-on pens.
- Fabric Choice: Evenweave fabrics make counted stitches a breeze.
And remember: this is your creative playground. Make mistakes, learn, and watch your confidence grow with every new technique.
7.2 DIY Kit Assembly: Budget-Friendly Alternatives
Let’s talk money—because embroidery should spark joy, not drain your wallet. Once you’re comfortable with the basics, assembling your own kit can be both cost-effective and creatively liberating.
DIY vs. Pre-Packaged Kits: The Real Cost
| Factor | Kits ($8–$15) | DIY ($1.50–$3.00 materials only) |
|---|---|---|
| Initial Cost | All-in-one, quick start | Low per project, more sourcing time |
| Long-Term Cost | Higher (redundant supplies) | Lower (bulk buying) |
| Convenience | Immediate, no research | Flexible, but time-consuming |
| Quality Control | Consistent, beginner-proof | Risk of mismatched materials |
| Creative Range | Fixed designs/colors | Unlimited customization |
Kits are perfect for small, one-off projects or when you crave instant gratification. DIY shines for larger or recurring projects—buying fabric and threads in bulk, and investing in a reusable hoop, can slash your costs over time.
Building Your Own Kit
- Threads: Buy full skeins instead of pre-cut lengths—cheaper and more color options.
- Hoops: Invest in a sturdy, reusable hoop (bamboo or plastic). For garment embroidery, upgrading to a magnetic hoop like MaggieFrame can save you time, reduce fabric distortion, and last for years.
- Fabric: Purchase fabric by the yard or repurpose old linens—think eco-friendly and budget-wise.
- Needles & Tools: A basic needle set and sharp scissors are all you need to start.
YouTube creators often show off their custom “embroidery boxes”—collections of threads, hoops, and fabric ready to go for any spontaneous project. It’s like having your own creative toolbox, tailored to your style.
Strategic Tips for Beginners
- Start with kits to learn the ropes, then transition to DIY for bigger savings.
- Bulk-buy threads and fabric once you know your favorite colors and textures.
- Keep your tools organized for easy access and less frustration.
And if you’re ready to take your garment embroidery to the next level, MaggieFrame’s magnetic hoops are a smart investment—offering even tension, quick setup, and durability that outlasts basic hoops.
8. Conclusion: Your Journey Starts Here
Embroidery is more than a craft—it’s a journey of creativity, patience, and self-discovery. Start with a comprehensive kit to build your foundation, practice those essential stitches, and don’t be afraid to branch out into your own designs. Whether you stick with kits or dive into DIY, remember: every stitch is a step forward. Enjoy the meditative rhythm, celebrate your progress, and let embroidery become your personal retreat. Happy stitching!
9. Beginner Embroidery FAQ
9.1 Q: How do I choose my first embroidery kit?
A: Look for kits with high-quality cotton fabric and beginner embroidery machine compatibility, sturdy wooden or bamboo hoops, clear instructions (preferably with illustrations or video links), and a good variety of threads. Starter kits that include all essentials—fabric, hoop, threads, needles, and instructions—make learning much easier.
9.2 Q: What should I do if my threads keep tangling?
A: Cut your thread to a manageable length (about 18 inches), separate strands gently, and use high-quality floss. Keep your thread smooth as you stitch, and avoid pulling too tightly. If knots form, gently untangle or trim and re-thread as needed.
9.3 Q: Can I reuse embroidery hoops?
A: Absolutely! Most hoops, especially wooden or bamboo ones, are designed for reuse. After finishing a project, simply remove your fabric, clean the hoop if needed, and it’s ready for your next creation.
9.4 Q: How do I fix uneven stitches?
A: Practice makes perfect! Use scrap fabric to try out different stitch lengths and tensions. Keep your stitches consistent by paying attention to spacing, and don’t hesitate to undo and redo a section if needed. Over time, your control and technique will improve.
9.5 Q: What’s the best way to transfer my own designs onto fabric?
A: Popular methods include using carbon paper, iron-on pens, or water-soluble pens. Choose the method that matches your fabric and the permanence you want. Always test your transfer on a scrap first to avoid surprises.
9.6 Q: Is embroidery an expensive hobby?
A: Not necessarily. Starter kits are affordable, and DIY assembly can save money in the long run. Buying threads and fabric in bulk, and reusing hoops and needles, keeps costs down while letting you explore endless designs.
---
Ready to thread your next adventure? Your embroidery story is just beginning—one stitch at a time.
